Gaming In Distress
Saturday, July 20, 2013
Friday, June 21, 2013
Friday, March 1, 2013
Child Labor, Pt. 1
Why bother making your own spaceship schematics when you can get children to do it for you? That's what we stand for here in Bartholomew's Domain. Good enough for Steve Jobs, good enough for me.
.JPG)
Wednesday, February 6, 2013
Saturday, February 2, 2013
How to Make a Tile
I'm using GraphicsGale, which is free for Windows. Mac users may find luck with Pixen or Asesprite.
Step 1:
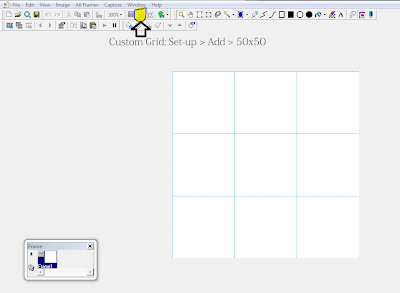
Tiles are 50px by 50px. Creating a new custom grid in GG will set you right. Alternatively, you can just draw a 50x50 rectangle, then draw inside that.
Step 2:
Like a jigsaw puzzle, it's best to start with the edges first. That way, you know they overlap right.
Step 3:
Fill in the middle, still janky and one color. Just need a blueprint.
Step 4:
Get yourself a palette, if you haven't yet.
(Four colors. Kinda blurry here.)
Step 5:
Fill in the shapes, then get rid of those jagged edges!
Er, I mean...
Step 6:
COLORING!!!
Step 7:
Give it a background color, and be sure to color the background with different stuff so it looks complex. Then add a few lil doodads in the blank spaces and you're all set.
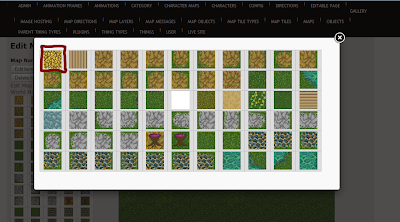
Step 8: After EMAILING US for a username and login go to bartholomewsdomain dot org backslash Admin. Then do Gallery > Tiles > Pictures:
Step 9:
Add that sucker. Then go to Map Tile Types and bless your new friend with a name.
Step 10:
Go to a map of your choosing and click on a tile...
...what kinda tile you want?...
BOOM! (you can also double-click on the tiles to the left and stamp it wherever you please).
All done in less time than it takes to roast a chicken.
-Joe
Sunday, January 27, 2013
Thursday, January 24, 2013
Subscribe to:
Comments (Atom)


.jpg)
.jpg)


-2003-(1)-hlm.JPG)


